Embarking on your Filofax journey? You’ve made an excellent choice! This iconic planning system has been revolutionising organisation for decades, and now it’s your turn to unlock its potential. In this comprehensive guide, we’ll walk you through everything you need to know to set up your Filofax planner like a pro. From choosing the right size to customising your inserts, we’ve got you covered. Get ready to transform your daily routine and boost your productivity with the perfect Filofax setup!
While Filofax is a well known brand and has started producing these types of ring-bound planners, there are other companies around which also offer planners in various sizes. The most known next to Filofax are Gillio Firenze, Van der Spek and Moterm.
Embarking on your Filofax journey begins with a crucial decision: choosing the right size. This choice will significantly impact your planning experience, so it’s essential to consider your needs carefully. Filofax offers a range of sizes, each designed to cater to different lifestyles and planning styles.
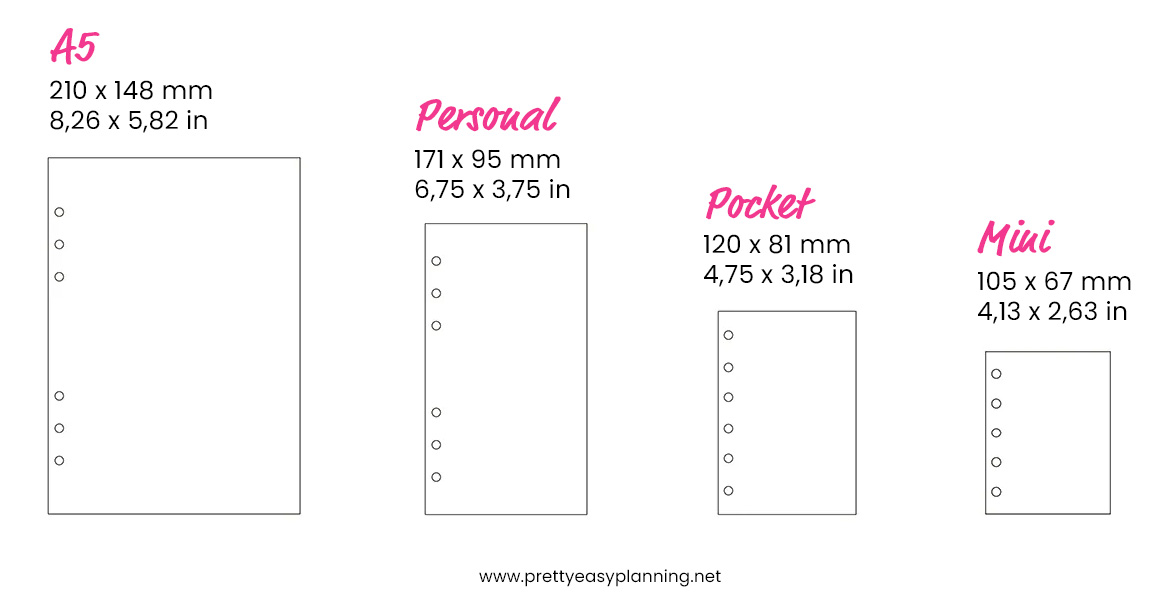
The Personal size (95mm x 171mm) is a popular choice for many, striking a balance between portability and ample writing space. It’s large enough to accommodate detailed daily planning but small enough to slip into a bag or larger pocket. This versatility makes it ideal for those who need a comprehensive planner that can travel easily.
For those who require more space for extensive planning or note-taking, the A5 size (148mm x 210mm) is an excellent option. Its generous dimensions provide room for detailed schedules, project planning, and even journaling. While less portable than smaller sizes, the A5 is perfect for desk use or for those who carry larger bags.
The Pocket size (81mm x 120mm) is designed for planners on the move. Its compact dimensions make it easy to carry in a pocket or small purse, ideal for quick reference and jotting down ideas or appointments on the go. While it offers less writing space, its portability makes it a favorite among minimalist planners or those who prefer digital planning for more detailed tasks.
For the ultimate in compact planning, the Mini size (67mm x 105mm) offers essential planning capabilities in the smallest package. It’s perfect for those who need to track basic information like appointments and to-do lists without the bulk of a larger planner.
When selecting your Filofax size, consider your lifestyle, planning needs, and where you’ll use your planner most often. Think about the amount of information you typically need to track and how much writing space you require. Also, consider where you’ll carry your planner – in a bag, pocket, or primarily on a desk. Remember, the ideal size is one that integrates seamlessly into your daily routine, encouraging consistent use and enhancing your organization and productivity.
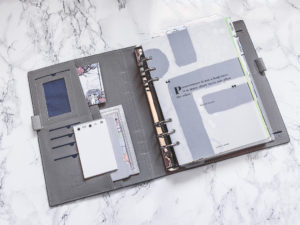
One of Filofax’s standout features is its ring binder system. This allows for easy insertion and removal of pages, making your planner infinitely customizable. Familiarize yourself with how to open and close the rings gently to avoid damage. Pro tip: Always open both ends of the ring mechanism to ensure even distribution and prevent warping.
When setting up your Filofax as a newcomer, it’s crucial to start with a core set of essential inserts that will form the backbone of your planning system. These fundamental components will help you establish a solid organizational foundation without overwhelming you with too many options right from the start.
Begin with calendar pages, choosing between weekly or daily layouts based on your planning style and the level of detail you prefer. Weekly spreads offer a broader overview, while daily pages provide more space for detailed scheduling. Next, include to-do list inserts, which are vital for tracking tasks and ensuring nothing falls through the cracks. Note pages are equally important, offering a place to jot down ideas, meeting minutes, or any other information that doesn’t fit neatly into other categories.
An address book insert is another key element, allowing you to keep important contact information at your fingertips. Dividers are essential for organising your Filofax into logical sections, making it easy to navigate and find information quickly.
As you become more comfortable with your Filofax and develop your planning style, you can gradually incorporate more specialised inserts. These might include meal planners to help with dietary goals, budget trackers for financial management, or goal-setting worksheets to keep you focused on your aspirations. The beauty of the Filofax system lies in its flexibility, allowing you to customise and expand your planner as your needs evolve. Remember, the key is to start simple and build up gradually, ensuring that each insert serves a purposeful role in your organisational system.
Crafting the perfect layout for your Filofax is where your planner truly becomes a personalized productivity powerhouse. While there’s no one-size-fits-all approach, starting with a classic structure can provide a solid foundation that you can later customize to your heart’s content.
Begin with the front section of your Filofax. This prime real estate is ideal for storing crucial information you need quick access to. Consider including a personal information page, emergency contacts, and perhaps a yearly overview calendar. This setup ensures that vital details are always at your fingertips.
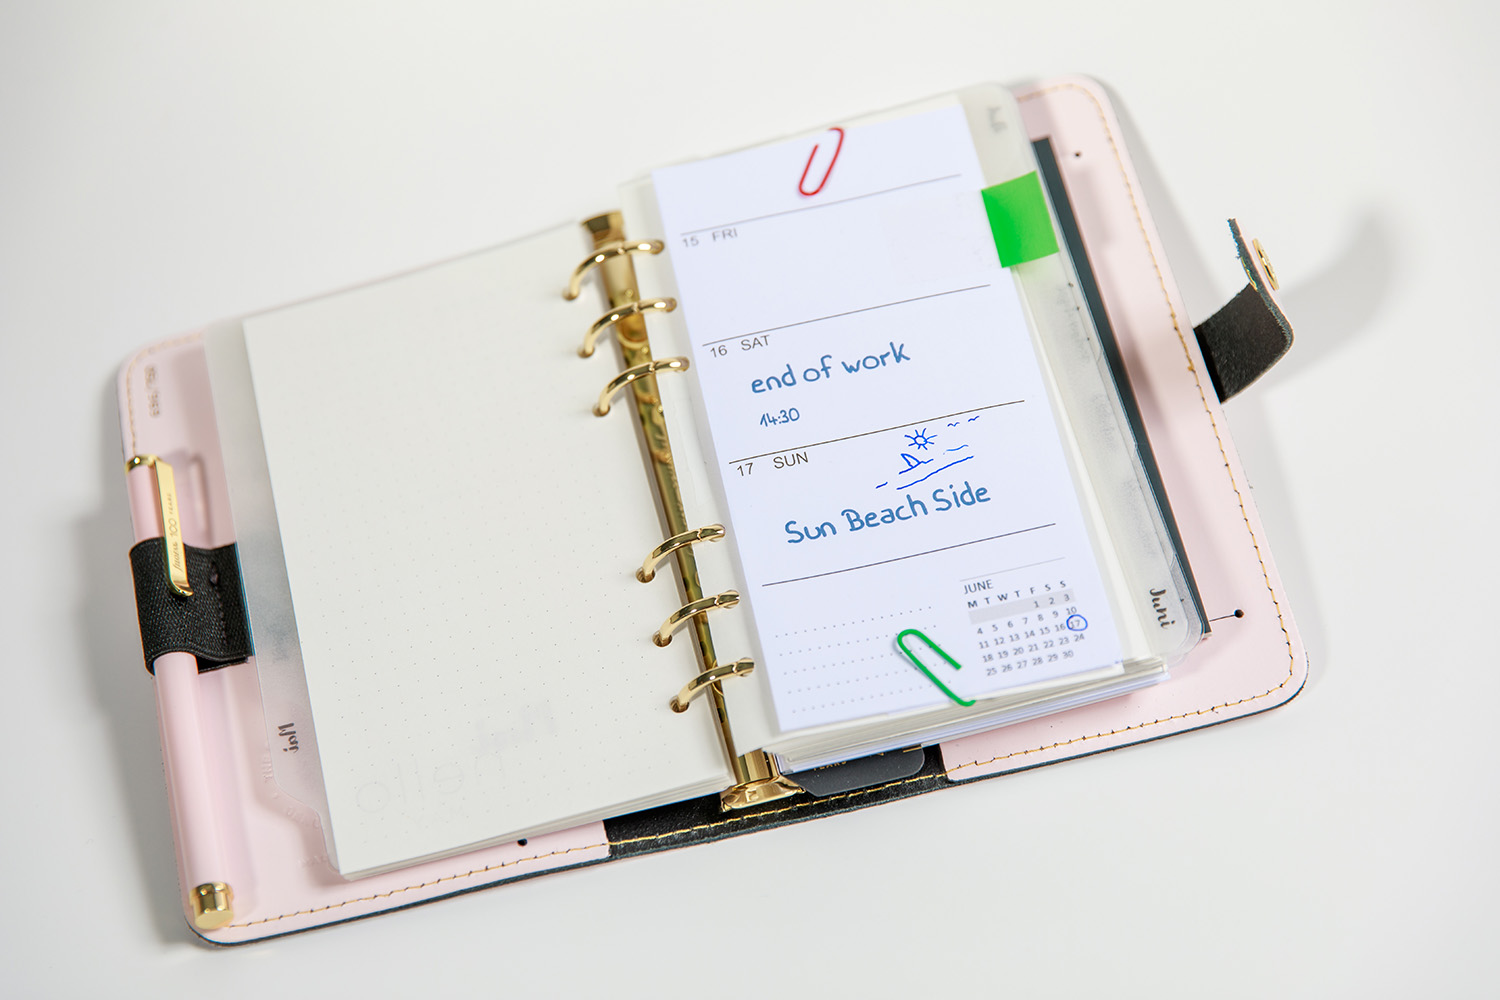
Section 1 should be dedicated to your calendar. Start with monthly overview pages, which give you a bird’s-eye view of your commitments and deadlines. Follow these with your choice of weekly or daily pages, depending on how detailed you like to plan. Some planners even use both, with weekly spreads for general planning and daily pages for more intensive periods.
Next, allocate Section 2 to your to-do lists and projects. This is where the real productivity magic happens. Include pages for ongoing to-do lists, project planning sheets, and goal trackers. You might want to subdivide this section further, perhaps separating work-related tasks from personal projects.
Section 3 is your creative hub for notes and ideas. This is where you can let your thoughts flow freely. Include blank or lightly lined pages for brainstorming, mind mapping, or simply jotting down random thoughts. You might also want to add some grid paper for more structured note-taking or sketching.
Reserve Section 4 for your contacts. While many of us rely on digital contact lists, having a physical backup can be invaluable. Consider organizing this alphabetically for easy reference.
Finally, the back section of your Filofax is perfect for miscellaneous items that don’t fit neatly elsewhere. A plastic sleeve for receipts, a ziplock bag for small items like paperclips or stamps, and perhaps a few extra note pages can all find a home here.
Remember, this layout is just a starting point. As you use your Filofax, you’ll naturally discover what works best for you. Don’t be afraid to experiment and adjust your layout accordingly. You might find that you need an entire section dedicated to a specific project, or perhaps you want to integrate your meal planning directly into your weekly spreads.
Some planners like to rearrange their Filofax seasonally, shifting focus as their priorities change throughout the year. Others prefer to maintain a consistent layout, finding comfort in the familiar structure. There’s no right or wrong approach – the key is to create a system that enhances your productivity and brings you joy to use.
Consider also the visual aspect of your layout. Color-coding, tabs, or even washi tape can help you navigate your Filofax quickly and make the planning process more enjoyable. You might use different colored papers for different sections or create custom dividers that reflect your personal style.
Ultimately, crafting your perfect Filofax layout is an ongoing process. It’s about creating a system that adapts to your life, not the other way around. So start with this classic structure, but don’t hesitate to tweak, adjust, and personalize as you go along. Your perfect layout is out there – it’s just waiting for you to discover it.
Transforming your Filofax from a functional planner into a personal work of art is one of the most enjoyable aspects of the Filofax experience. This process of personalisation not only makes your planner uniquely yours but also increases the likelihood that you’ll use it consistently. Let’s dive into some creative ways to make your Filofax truly reflect your personality and style.

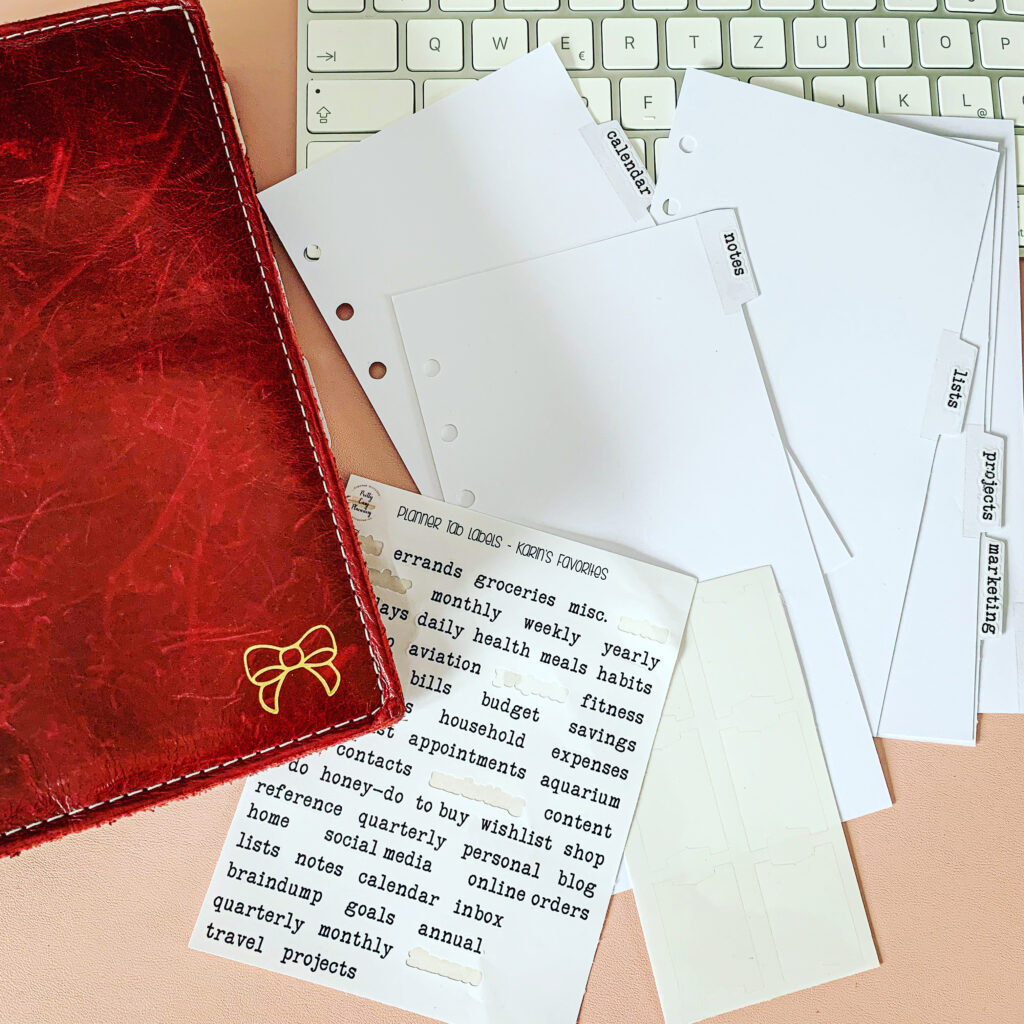
First, consider your dividers. These aren’t just organisational tools; they’re prime real estate for self-expression. While Filofax offers a range of attractive dividers, creating your own allows for unlimited customisation. Scrapbook paper is perfect for this purpose, offering a vast array of patterns, colours, and textures. Choose papers that resonate with your aesthetic – whether that’s minimalist and monochrome or bright and bohemian. For added durability, laminate your custom dividers or use clear adhesive contact paper.
Blank pages in your Filofax are like canvases waiting for inspiration. Fill them with quotes that motivate you, lyrics that speak to your soul, or affirmations that boost your mood. Handwrite these in your best calligraphy, or print them out in fonts that appeal to you. Don’t forget about visual inspiration – add photos of loved ones, dream destinations, or vision board elements. These personal touches transform your Filofax into a source of daily inspiration and joy.
Washi tape is a planner enthusiast’s best friend, and for good reason. This decorative adhesive tape comes in countless designs and serves multiple purposes. Use it to add pops of color to your pages, create borders, or even fashion makeshift tabs. Washi tape is also excellent for color-coding different areas of your life. For instance, use blue tape for work-related items, green for personal tasks, and pink for social engagements. This visual system makes it easy to grasp your schedule at a glance.
Stickers are another versatile tool for personalizing your Filofax. They’re perfect for marking important dates, highlighting key information, or simply adding a touch of whimsy to your pages. From functional stickers like checkboxes and arrows to decorative elements like flowers or seasonal motifs, the options are endless. Create your own stickers for a truly personal touch, or explore the vast selection available from planner-focused retailers.
Remember, the goal of personalizing your Filofax is to create a planner that you genuinely love. It should be a reflection of your personality, a tool that brings you joy every time you open it. Don’t be afraid to experiment with different decorative elements and layouts until you find what works best for you. Your Filofax should evolve with you, adapting to your changing needs and preferences over time.
Ultimately, a personalized Filofax is more than just a pretty accessory – it’s a powerful motivator for staying organized and productive. When you’re excited to open your planner each day, you’re more likely to use it consistently. This regular engagement with your goals, tasks, and schedule can significantly impact your overall productivity and life satisfaction. So, let your creativity flow and turn your Filofax into a personal masterpiece that supports and inspires you every single day.
To truly harness the power of your Filofax and transform it into a productivity powerhouse, it’s essential to develop habits and strategies that maximize its potential. One of the most impactful practices you can adopt is the daily review. Dedicate 5-10 minutes each evening to plan for the following day. This brief session allows you to reflect on your accomplishments, carry over any unfinished tasks, and set clear intentions for tomorrow. By doing this consistently, you’ll wake up each morning with a roadmap for success, reducing decision fatigue and increasing your overall efficiency.

Color-coding is another powerful tool in your productivity arsenal. Assign specific colours to different areas of your life – for instance, blue for work tasks, green for personal errands, and red for health-related activities. This visual system allows you to quickly grasp the nature of your commitments at a glance, helping you balance your various responsibilities more effectively. You can apply this colour-coding to your calendar entries, to-do lists, and even your notes, creating a cohesive and easily navigable planner.
Implementing the ‘two-minute rule’ can significantly reduce the clutter in both your Filofax and your mind. This principle suggests that if a task will take less than two minutes to complete, do it immediately rather than writing it down. This approach prevents your to-do list from becoming overwhelmed with minor tasks and gives you a sense of immediate accomplishment, boosting your motivation for tackling larger projects.
Regular archiving is crucial for maintaining an efficient and current Filofax. Set aside time each month to review your planner and remove completed pages. This not only keeps your Filofax from becoming unnecessarily bulky but also provides an opportunity to reflect on your progress and achievements. Consider keeping these archived pages in a separate binder or folder – they can be valuable for future reference or when conducting annual reviews.
Remember, the key to maximizing productivity with your Filofax is consistency. These strategies are most effective when implemented regularly. As you incorporate these habits into your routine, you’ll likely discover additional techniques that work well for you. Don’t be afraid to experiment and refine your system over time. Your Filofax should evolve with you, continuously adapting to support your changing needs and goals. By leveraging these productivity-boosting strategies, you’ll transform your Filofax from a simple planner into an indispensable tool for personal and professional success.
Embarking on your Filofax journey can be exciting, but it’s not uncommon to encounter a few bumps along the way. Let’s tackle some of the most common challenges new Filofax users face and explore practical solutions to keep you on track. First up is the dreaded overwhelm. It’s tempting to dive in headfirst, filling your planner with every insert and tracker imaginable. However, this approach often leads to frustration and abandonment. Instead, start simple. Begin with just the essentials: a calendar, to-do lists, and some note pages. As you grow more comfortable with your system, gradually introduce new elements. This step-by-step approach allows you to build a sustainable planning habit without feeling swamped.
Inconsistency is another hurdle many newbies face. You start with the best intentions, diligently using your Filofax for a week or two, only to find it gathering dust on a shelf. The key to overcoming this is visibility and accessibility. Place your Filofax somewhere you’ll see it multiple times a day – on your nightstand, next to your computer, or by the coffee maker. The constant visual reminder will prompt you to engage with your planner regularly. Additionally, make it a part of your daily routine. Perhaps review your day each morning over breakfast or update your to-do list before bed.
Lastly, let’s address the issue of overstuffing. It’s easy to get carried away, adding page after page until your Filofax is bursting at the seams. Not only does this make your planner unwieldy, but it can also be discouraging to use. The solution? Regular maintenance. Set aside time each month to review your Filofax. Archive completed pages, remove outdated information, and reassess which inserts are truly serving you. Remember, a streamlined planner is more likely to be used consistently. Don’t be afraid to experiment with different setups until you find what works best for you. By addressing these common challenges head-on, you’ll be well on your way to Filofax success, turning your planner into an indispensable tool for productivity and organization.
As you grow more comfortable with your Filofax and refine your planning style, you may find yourself ready to expand your organizational ecosystem. This evolution can take many forms, each offering new ways to enhance your productivity and tailor your system to your unique lifestyle.

One popular approach is to employ multiple Filofax planners, each dedicated to a specific area of your life. For instance, you might have one Filofax for work-related planning, another for personal and family matters, and a third for hobbies or side projects. This separation allows for more detailed and focused planning in each domain, without the clutter of unrelated information. It also provides the flexibility to carry only the relevant planner to different environments, maintaining privacy and reducing bulk.
In our digital age, integrating your Filofax with digital tools can create a powerful hybrid system. Apps like Evernote can complement your physical planner beautifully. Use Evernote to capture and organize digital information, then reference or incorporate it into your Filofax. This synergy allows you to leverage the strengths of both analog and digital planning methods.
Joining online Filofax communities can be incredibly inspiring and educational. Platforms like Instagram, Pinterest, and dedicated forums are treasure troves of ideas, layouts, and creative solutions. Seeing how others use their Filofax can spark new ideas for your own system. However, it’s crucial to remember that your Filofax journey is personal. While it’s great to draw inspiration from others, don’t feel pressured to replicate someone else’s exact system.
The true beauty of the Filofax lies in its flexibility and adaptability to your unique needs. What works perfectly for one person may not suit you at all, and that’s perfectly okay. Feel free to experiment, mix and match different elements, and create a system that truly resonates with your lifestyle and preferences. Your Filofax should be a tool that supports and enhances your life, not a source of stress or obligation. Embrace the journey of discovering what works best for you, and don’t be afraid to evolve your system as your needs change over time.
Congratulations! You’re now equipped with the essential knowledge to set up and use your Filofax planner like a pro. Remember, the key to planner success is consistency and personalization. Don’t be afraid to experiment with different layouts and systems until you find your perfect fit. Your Filofax is more than just a planner – it’s a powerful tool for organizing your thoughts, goals, and dreams. Embrace the journey, and watch as your productivity and organization skills soar to new heights. Happy planning!